Your Handy Guide To Preparing For Interior House Painting

Furniture already moved to the centre of the room - it's a great way to prepare for interior house painting
Updated May 2025 by Stephen Cochrane

The walls of your home have seen better days, and it’s time for internal house painting. Perth painters know that thorough preparation is the key to painting success. But the excitement of getting a home renovation project underway can come at the expense of good house painting prep.

Your walls deserve better than that!

Whether you’re calling in professional residential painters in Perth (that’s us!) or trying your hand at DIY, a house painting plan is essential. You’ll be surprised how even basic planning can make the home interior painting process so much smoother – for the project itself and the finish on your walls!

In this handy guide, you’ll learn what you need to know about preparing for house painting, including:

  • 5 Things To Consider Before You Start Painting
  • Essential Supplies to Paint a Room
  • 5 Things To Do Before Professional Interior Painters Arrive
  • Home Interior Painting FAQs

5 Things to Consider Before You Start Painting

Nothing beats the look of a house that has just been freshly painted. The transformation is instant, adding aesthetic appeal and increasing the value of your home. But DIY home interior painting is not as simple as it may seem, and there are more than a few ways that things can go wrong.

You need a plan – and knowledge to help you avoid the pitfalls. Here are 5 things to consider and some helpful painting tips to ensure you get the professional finish you’re looking for.

1. Do You Need a Primer Coat?

Using a primer on surfaces assists with paint adhesion, hiding stains and creating an even base to paint on. This will help you achieve a smooth overall finish for your painting renovations.

We recommend using a primer if you’re:

  • painting walls that have never been painted before (e.g. plasterboard painting in a new home)
  • painting walls with staining from water damage, smoke, etc.
  • repainting dark walls with a lighter colour
  • applying new acrylic paint over an old oil-based paint
  • unsure what type of paint was used previously.

If in doubt, use a product like Dulux Precision Maximum Strength Adhesion Primer, which is formulated for tricky surfaces.

Note: Previously painted walls that are clean, smooth and undamaged may not require primer. Always use the same paint type that’s currently on the walls for the new coat. If you’re unsure if the old paint was oil or acrylic, buy a sample pot of your new paint and test it on an inconspicuous section of the wall. If it doesn’t adhere properly, primer is a must!

2. Best Conditions for Interior Painting

Freshly painted home interiors are always a good idea, no matter the season. However, it’s a good idea to avoid painting during extreme temperatures, as both very high and very low temps can impact paint cure and adhesion.

Plan to paint when:

  • the temperature is between 10°C and 30°C
  • the forecast is relatively stable (no big fluctuations between the daytime high and evening low)
  • the humidity is low (below 70%), and there’s no rain
  • you have lots of natural light to see how the paint colour looks
  • you have plenty of time to finish the job.

3. Choosing a Paint Sheen Level

When selecting paint, you’ll need to consider the sheen level. This refers to how shiny the paint is and how much light it reflects.

You may be drawn to a particular paint sheen because you want to achieve a particular finish. However, preferred aesthetics are just one element to consider. The sheen level you choose can impact paint durability, colour, and how easy it is to clean. If you’re painting the whole house interior, you may require different sheens to achieve the look and durability you want in each room.

Here are the most common sheen types and where to use them.

Gloss

Gloss paint is highly reflective, giving a smooth and hard-wearing finish that’s a breeze to clean. But a word of warning, this shiny finish is unforgiving on surface imperfections – and on inexperienced painters. If your walls are uneven or damaged, you’ll need to thoroughly patch, prep, and prime. Find out how to strip paint off wood doorframes and window frames as part of the preparation process.

Ideal for: Family homes and high-traffic areas prone to fingerprints, especially doors, architraves and windows.

Semi-Gloss

When you want a less shiny but still sleek finish that can withstand high traffic, semi-gloss is an excellent, easy-to-clean choice.

Ideal for: High-traffic spaces, including kitchens and lounge rooms, as well as walls, cupboards, skirting, and doors.

Low Gloss

Chip-resistant and tough, low gloss is a great alternative to high gloss if you’re painting an older home with surface imperfections that you’d like to conceal. Use on timber trims to complement low sheen walls.

Ideal for: Doors, windows, and trims, especially if reducing the appearance of surface imperfections is desired.

Low Sheen

For a velvety finish that is highly durable, easy to clean, and better at hiding imperfections, consider low-sheen paint.

Ideal for: Rooms that require frequent cleaning, including kitchens, bathrooms, and laundries.

Matte Finish

Choose a matte sheen for a sophisticated, low-reflection finish that conceals imperfections and softens room glare.

Ideal for: Reducing glare in hallways and rooms with big windows.

4. Oil-based vs. Water-based Paint

Oil-based paints are:

  • difficult to paint with and require professional application to achieve a flawless finish
  • proven to be hazardous to human health and the environment
  • flammable, emitting high levels of dangerous volatile organic compounds (VOC) and producing strong fumes
  • slow-drying (although they may require fewer coats)
  • not easy to clean up and requires mineral turpentine
  • hard-drying and very durable
  • used for heavy-duty applications and provide superior resistance to wear and tear
  • better for achieving an extremely glossy and smooth finish
  • prone to yellowing and cracking
  • best for window frames.

Water-based paints are:

  • easier to paint with and more forgiving for beginners
  • safer to use and more environmentally friendly, producing lower odours
  • better for your health, containing reduced VOC
  • faster drying (but may require more coats)
  • much simpler to clean – just use water and soap
  • non-yellowing
  • less robust and durable (may need to be repainted sooner)
  • not always suitable for window frames.

5. Choosing Paint Colours

Choosing colours as part of an interior repaint can be overwhelming! You may love a current colour trend, but it can be tricky to know if it will work in your home. Will these colours complement your existing furniture, décor, and window treatments? Paint colour can also change the way a room feels. Which colours create an airy, spacious feel and which can close a space in and make it appear darker?

Integrating and harmonising interior paint colours is a skill, and if you don’t have it, the results could haunt you for the next ten years! To avoid bold feature wall regret, sticking with neutral undertones in your colour palette is the safest bet.

However, if you want to attempt something a little more adventurous, try the 60-30-10 colour rule. Apply this rule to each room for a balanced colour scheme. Choose three colours in each room using the following percentages:

  • 60% Main Colour: Use this colour for walls, rugs, and large furniture, like your couch.
  • 30% Secondary Colour: Add contrast by using this colour for curtains, side chairs, and bed linens, or on a feature wall.
  • 10% Accent Colour: Use this pop of colour in cushions, throws, lamps, and artwork.

Of course, you still need to decide which colours to use – and your paint will be the main colour choice. Take a look at this colour wheel for inspiration. Bear in mind that some colours are better than others for different spaces. For example, the best paint colour for small rooms could leave a larger open-plan space feeling cold and lifeless.

Essential Supplies to Paint a Room

Keen to try your hand at DIY interior painting? Great! Let’s look at the must-have supplies you’ll need to ensure a professional finish.

Preparation

  • Paint scraper: For scraping off old paint where necessary.
  • Gap filler (e.g. Spakfilla): To fill any surface holes or dings.
  • Spatula: To apply the gap filler with.
  • Hand sander and sandpaper: To ensure surfaces are smooth and even.
  • Buckets, sugar soap, and cleaning cloths: For cleaning dust, dirt, and grime off the surface before painting.
  • Mould killer: To ensure surfaces are free of mould and mildew before you begin (painting over mould will not kill the spores).
  • Masking tape: For taping off anything that borders where you’re going to paint (light switches, power sockets, skirting boards, etc).
  • Drop sheets: For protecting the floor and furniture from paint splatters.
  • Paint stirrer: To mix paint properly.
  • Old clothes: Painting is messy work – enough said!
  • Old rags/paper towels: To mop up paint drips before they dry.

Paint Brushes & Rollers

  • Cutting-in brush: Properly painting the edges of a wall (cutting in) is important, so choose a quality cutting-in brush, 2-3 inches in width.
  • Small, shallow container or paint tray: Holds paint for cutting in.
  • Roller: For painting most of a surface. For a smooth finish, choose a quality roller and make sure it’s suited to the finish you want.
  • Roller tray: Holds the paint and allows you to load up the roller.
  • Painter’s pole/roller pole: This will give you extended reach to paint high walls. In most cases, it should mean you don’t need a ladder or scaffolding.

Paint

Here are some tips for buying paint.

  • Always choose the highest quality paint you can afford.
  • Ensure you choose the right paint type for the room you’re painting to maximise longevity.
  • Seek expert advice on which sheen type will provide the finish and durability you need.
  • If you’re painting a bathroom, you’ll need paint that can handle damp, humid conditions and that offers mould resistance.
  • Calculating the correct amount of paint is important and saves you from running out before the job is finished. A paint calculator can help. 

To DIY Paint or Not to DIY Paint? That is the Question!

You know DIY interior house painting requires you to make multiple important considerations. You know you’ll need paint and plenty of other gear, and if a professional finish is important to you, it will need to be the highest quality paint and gear you can afford. And then you’ll need to brush up on how to paint a room.

It’s at this point that many enthusiastic DIYers decide that interior house painting is a job best left to the professionals. If that’s where you’ve landed, we understand, and we’re here to help.

But why choose AJ Cochrane & Sons?

  • Unrivalled Experience: After almost 100 years as professional painters in Perth, our technical skill and local expertise are second to none.
  • Trusted Reputation: From historical painting restorations to major commercial projects, we’re the WA painters of choice for residential, commercial and industrial clients across our great state.
  • Industry Recognition: We’ve received more than 60 Awards of Excellence from the Master Painters & Decorators Australia WA Association.

When you choose the residential house painters Perth homeowners depend on for expert advice and exceptional interior painting, there’s much less to consider. We streamline the entire process, guiding you through every choice. We even have an interior stylist who can help you design the perfect colour scheme for your home.

So if painting your home in Perth is starting to feel more stressful than fun, get in touch.

Professional painters at work - what you need to do to prepare for interior painting

5 Things To Do Before Professional Interior Painters Arrive

The best Perth painters are on their way for the interior paint job in your home! By calling in the professionals, you can be confident that you’ll get the gorgeous paint finish you’re looking for. Our streamlined painting project management ensures minimal hassle to you and your family. However, there are things you can do ahead of our arrival that can make the process even smoother.

By taking steps to prepare your house for painting, you can:

  • reduce prep time for your painters so they can start painting sooner
  • create a safer work environment
  • minimise painting disruption and delays
  • protect your belongings.

Here are our five top tips for house painting preparation in Perth.

1. Remove fragile items and electronics from the room

Unplug and remove all electrical appliances and electronic devices from the space. This includes televisions, speakers, game consoles, lamps, and modems.

Next, remove fragile items. Do this before moving heavy furniture to avoid your favourite vase getting broken! Store these items somewhere safe and out of the way for the duration of the painting project. You’ll have peace of mind knowing they’re protected, and our team can move around the space more freely.

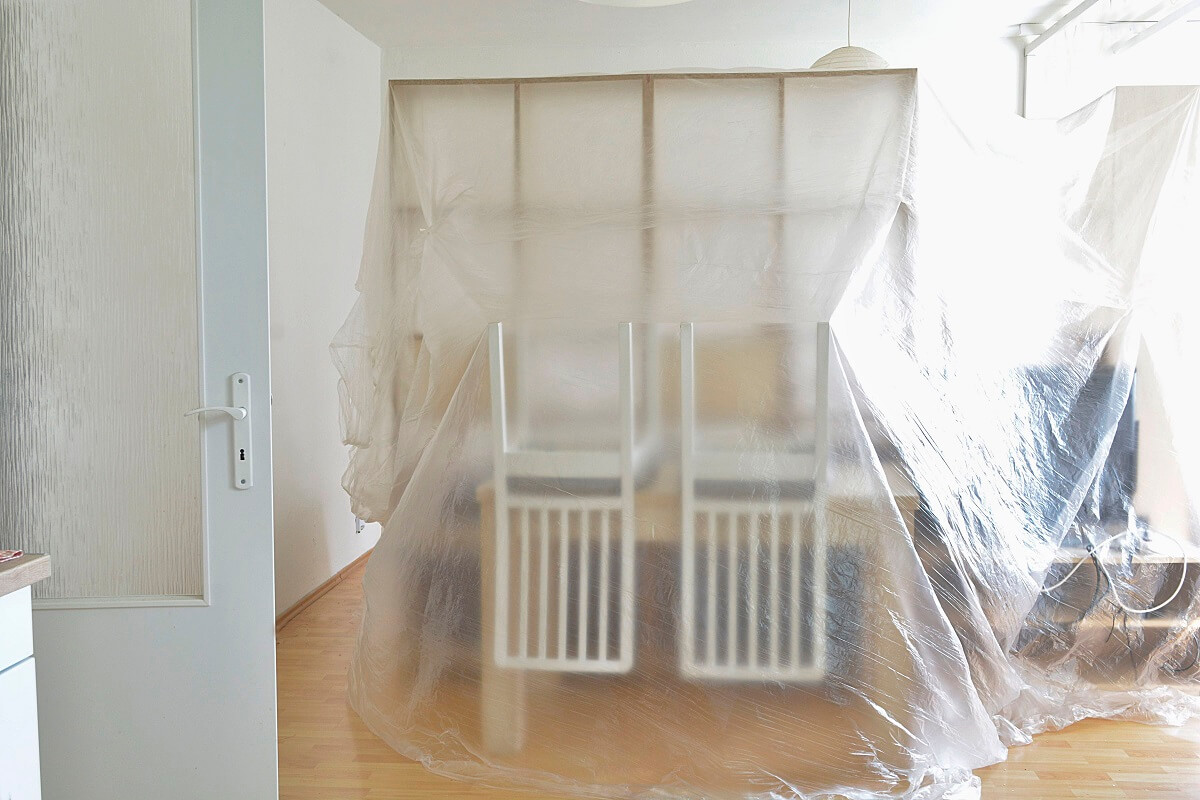
2. Move furniture to the centre of the room

Professional interior painters will use drop sheets to protect your flooring and furniture. However, moving all your furniture to the centre of the room reduces obstructions so that your painters can safely move through the space to paint, carry equipment, use ladders, and easily access the corners of the room for painting.

Tip: If you have the storage space (and people to do the lifting), consider removing all or most of the furniture from the room completely. This is the ideal scenario for professional residential painters, especially in small spaces.

3. Remove wall hangings, window treatments, switch covers, and light fixtures

Painting precisely around things like power points and ceiling lights is tricky – even for Master Painters. Avoid paint swipes and narrow unpainted borders by removing everything from the walls, windows and ceilings.

To create a blank canvas for your painters to work with, we recommend removing:

  • framed photographs
  • paintings
  • posters (and any residual adhesive, e.g. Blu Tack)
  • wall lights and sconces
  • other wall décor
  • covers on light switches and electrical outlets
  • light covers, shades and fixtures
  • window treatments including blinds, curtains and, where possible, the associated hardware (rods and rails). There’s no need to fix the holes left. We can either leave them so your window treatments can be re-hung or fix them as part of the service.  

4. Dust and vacuum the rooms

Start by dusting every surface, including the walls. Start from the top and work down. Once you’ve given every surface a thorough dust, vacuum the floor to collect the settled dust. This important step reduces the chance of dust ending up on your freshly painted walls.

If the project includes painting kitchen cabinets, ensure they’re thoroughly cleaned and free from cooking oil build-up. Use a degreaser for best results.

Simply by ensuring that your space is as clean and grime-free as possible, you can improve your painting results, avoiding rough finishes or extra costs associated with cleaning and preparation time.

5. Prepare kids and pets for the painter’s attendance

We recommend that your house painting plan include a strategy for keeping children and family pets safely away from rooms that are being painted.

As much as we love kiddos and furry friends, it’s not safe for them to wander around a room while our interior painters are working. After we’re gone, you’ll want to ensure the new paint has time to dry before curious little fingers and paws are allowed in. Glossy paint, in particular, tends to look best when it’s fingerprint and fur-free!

While most modern paints don’t have the powerful fumes that were once common, some people can be sensitive to the odour. Good ventilation will help. To keep air flowing through the house, it’s useful to keep windows and doors open, but this can make it harder to keep children and pets confined to a particular area of your home. If you can call in a favour for babysitting or pet-sitting, this will make painting days easier!  

Home Interior Painting FAQs

Wondering what happens once internal house painting is done? Here are the answers to common questions we’re asked.

What’s the best interior painting schedule?

Our team of skilled interior painters has overseen countless Perth home improvement projects. We’re experienced at working with residential clients to create a streamlined painting schedule tailored to individual requirements. We can stagger the painting of key rooms like the kitchen, bedrooms and bathrooms to reduce disruption to your daily life.

Deciding whether to move out during interior painting is a personal choice. Discuss the pros and cons of this with your painters to assist in making your decision.

Is it safe to sleep in a freshly painted room?

We generally recommend you wait at least 24 hours before sleeping in a freshly painted room. Although most paint on the market today is low in volatile organic compounds (VOC), you should give the room time to air out. Even the low-VOC Dulux paints we use can have a smell that some people find unpleasant to sleep with.

Remember, weather can be an important factor here. On a sunny summer’s day, paint is likely to dry much more quickly. In the depths of a Perth winter, you might need to allow extra time out of the room while the fumes dissipate.

How long should I wait to hang pictures back on the walls after painting?

Wait at least 48 hours before rehanging pictures or wall decor. In humid conditions, 72 hours may be necessary. While paint may feel dry to the touch within hours, it can remain soft and easy to damage until it has properly cured – and depending on the paint used, this can take up to a month. If in doubt, ask your professional house painters what they advise.

How long should I wait to move furniture back against the walls after painting?

As with pictures and wall decorations, wait at least 48 hours – and longer if you can. If the paint isn’t properly dry, you run the risk of damaging the finish, or getting paint on your furniture.

How soon can I walk on painted stairs?

Give your freshly painted stairs 24-48 hours to properly dry before walking on them. You won’t be able to access upstairs rooms during this time, so chat to your Perth painters about when the stairs will be painted so you can plan your living arrangements accordingly.

How do I maintain freshly painted walls in my home?

Cleaning your walls is an important part of keeping the gorgeous new paint looking its best. However, avoid wiping them until the paint has completely cured. Ask your interior house painters for an estimate of how long you should wait.

Once the paint cure is complete, maintain your walls by dusting them regularly with a soft cloth or duster. For tougher marks or stains, use a gentle cleaner and a soft sponge. Avoid harsh chemicals that could damage the paint.

What should I do if I notice imperfections after the residential painters have left?

Let us know! Customer satisfaction is at the core of everything we do, so if you’re not happy with something, we’d love the chance to resolve the issue. Please get in touch.

Professional, Hassle-Free Interior House Painting

AJ Cochrane & Sons has been the go-to residential painters Perth homeowners have trusted for more than 90 years. That’s four generations of interior house painting experience and expertise. What we don’t know about painting Perth house interiors isn’t worth knowing!

Our skilled residential painters provide a perfect paint finish with minimal interruption to your home and the greatest respect for your personal belongings.  From technical expertise to our customer-first approach, we deliver the best painting services Perth has to offer. And we’re Dulux Accredited, too.

Need a luxury house painter? We do that, too. From modern beach mansions in Cottesloe to elegant heritage homes in Peppermint Grove, our experienced team provides exceptional workmanship to match the beauty and prestige of your property.

When you’re ready to get started on your interior house painting project, our team will provide a preliminary no-obligation consultation to find out more about your painting needs.

Leave a Reply

Your email address will not be published. Required fields are marked *

eight + 9 =